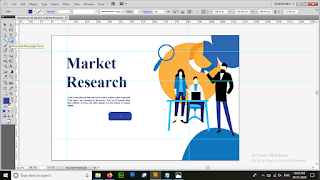
READ TO USE CREATIVE ASSETS
This tutorial, you will learn how Adobe Illustrator Legs make a beautiful banner. You can view the animated image effect below.
Tutorial Details
Program: Adobe Illustrator CS5.1 - 2010kaiserEstimated Completion Time: 17 Minutes
Tutorial Assets
In making this tutorial, I used the following written activities:Banner Design - We will use an image of Market Research in this banner design that we have taught in this tutorial.
Now that we have everything we need, so let’s start!
Step 1:- Create a new file with 1200px width and 800px height.
Step 2:- Open the PNG of the Fantasy tutorial mentioned above.
Step 3: - Now to make the banner, we adjust the PNG file on the new file that we had created.
Step 4:- Now we make a selection by clicking on the PNG file with the help of Pen Tool (P), while making the selection, we need to keep the selection as if the selection was made like a PNG and while clicking on the PNG with the Pen tool while making the selection, like PNG I rotate the pen tool in the same way, rotate the pen tool once, by missing the pen tool, the line is coming up in the extras, you can do the cutting by cutting the way you make points with the pen tool. While making the second point in ion, you will round the selection, then you will see the extra me line above it, you have to click on the second point and cut it, by doing this, you have to make the selection pen tool made from it.
Step 5:- Now after making the selection, when you feel that the selection has not been made right, then you can use the Direct Selection Tool (A) to fix the selection.
Step 6:- Now you have to take help of Ellipse tool (T) to create the rounded selection in PNG. To be afraid of duplicates, Copy (ctr + c) and then Pest (ctr + v).
Step 7: - Now we make the color feel in the selection, for this we have to click on the selection from the Selection Tool (V) and make the color feel from the No Selection box at the bottom of the menu bar. If you want any other color other than this, you can take another color by double clicking on the Fill (X) Tool by clicking on the selection.
Step 8: - Now we remove the Stroke of the selection, for this, we have to click on the selection from the Selection Tool (V) and in the top of the menu bar no Selection box is coming, in which we filled the color in the selection. The Stroke is written in it, we have to make it None, where we need the stroke, click on the Stroke Color Box and change the stroke color and increase the stroke, then increase it on the stock itself. Land is to be more select.
Step 9: - Now we have to give the text in the banner, for this we have to click on the Type Tool (T) and type the text and to change the text color, size and font, select the text from the top of the menu bar in the Character Box. Coming is to change the text color, size and font by clicking on it.
Step 10: - Now we have to create a Button for read more, for this, we have to create an area by clicking on the Rounded Rectangle Tool and after filling in it and typing text on it.
Step-11: - Now we have to set the Background of the banner, for that we have to be on the Rectangle Tool and make a selection, in that we have to give Background Color White and Stroke Color Blue and click on Arrange to back up the selection. is.
In this way you can make a beautiful banner.


Post a Comment