
READ TO USE CREATIVE ASSETS
In this tutorial, you will learn how to create a Beautiful Storytelling Double Exposure Photos Effect with of quality in Adobe Photoshop Legs Adobe Photoshop. You can see the Beautiful Storytelling Double Exposure Photos effect below.

Tutorial Details
Program: Adobe Photoshop ccEstimated Completion Time: 10 Minutes
Tutorial Assets
In making this tutorial, I used the following written activities:Photo Editing - We will use an background image in this Photo Editing that we have taught in this tutorial.
Now that we have everything we need, so let’s start!
Step 1: - The image to be edited will Open the image at the Photo Shop.

Step 2 :- After this, open the second image on the new tab.

Step 3 :- After this, we have to copy the image with the help of Ctrl + T of the image. And to press Ctrl + I from the keyboard.


Step 7 :- After this we have to go to Adjustment and click on Vibrance. And saturation has to be reduced to -100.


 Step 8 :- After this we have to click on lavels and do it less as per your requirement.


Step 13 :- After that we have to go to our previous image. And the effect that was given on the image now is to be kept and adjusted with the help of Ctrl + T on the background.


 Step 14 :- After that we have to clear the extra image which is coming with the help of Eraser Tool (E), then right click and select Chalk 23 pixels brush. You can keep its size according to yourself. And we have to use it to give effect by clean the image.


Step 17 :- After this, you have to click on the brush tool (B) and then right click on the image and select Chalk 23 pixels brush and change its size as per your requirement.


Step 18 :- After this, put an effect on the image.


Step 19 :- After this, we have to go to the image layer to make the brush tool's effect work according to our needs.

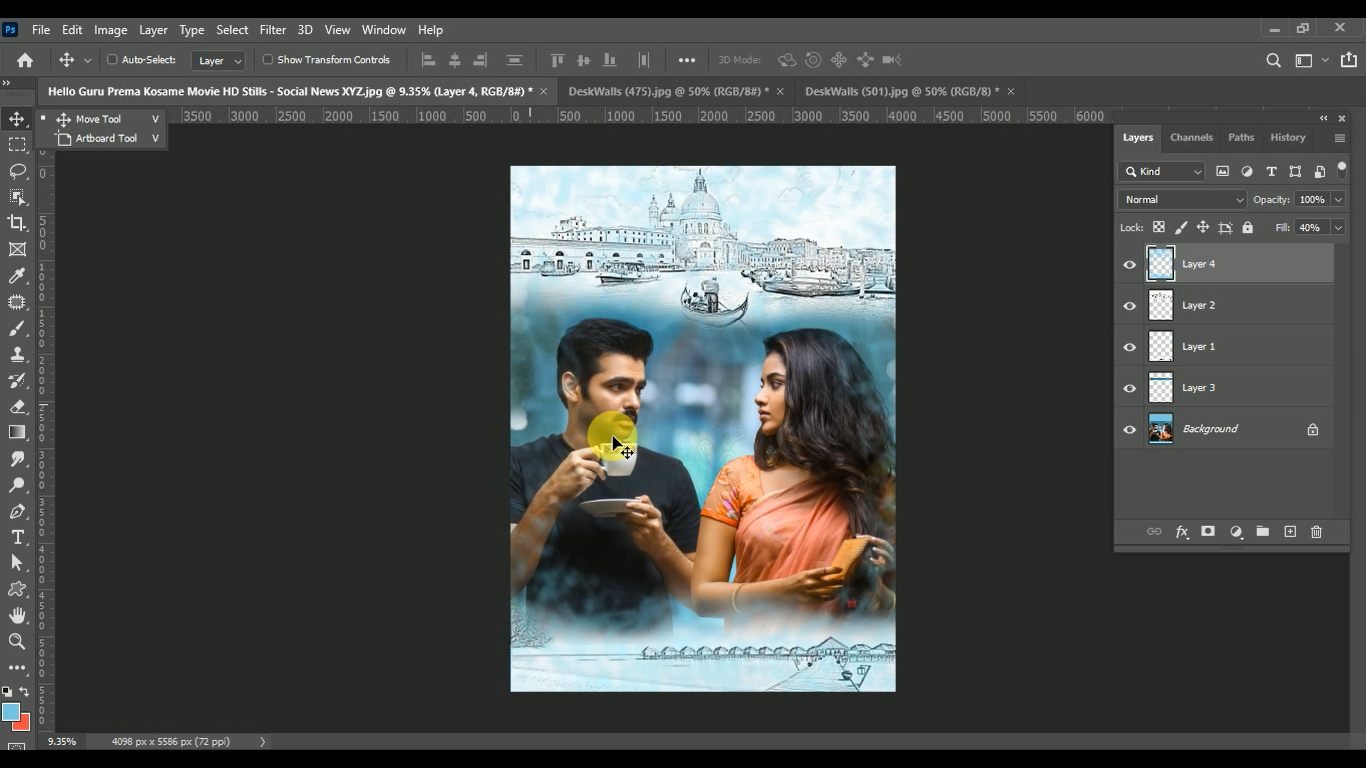
In this way you can made a Beautiful Storytelling Double Exposure Photos In Adobe Photoshop.

If you want to get Beautiful Storytelling Double Exposure Photos In Adobe Photoshop in your Image, then you can Contact me.
Nice to Learn
ReplyDeleteGood work
ReplyDeletePost a Comment