READ TO USE CREATIVE ASSETS
This tutorial, you will learn how Adobe Illustrator Legs make a beautiful banner. You can view the animated image effect below.
Tutorial Details
Program: Adobe Illustrator CS5.1 - 2010kaiserEstimated Completion Time: 60 Minutes
Tutorial Assets
In making this tutorial, I used the following written activities:
Banner Design - We will use an image of Radha Krishna in this banner design that we have taught in this tutorial.
Now that we have everything we need, so let’s start!
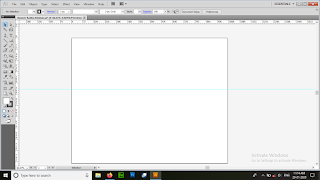
Step 1:- Create a new file with 1000px width and 800px height.
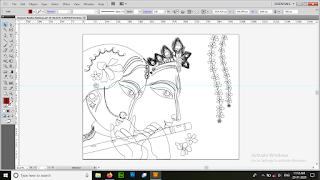
Step 2:- Open the PNG of the Fantasy tutorial mentioned above.
Step 3: - Now to make the banner, we adjust the PNG file on the new file that we had created.
Step 4:- Now we make a selection by clicking on the PNG file with the help of Pen Tool (P), while making the selection, we need to keep the selection as if the selection was made like a PNG and while clicking on the PNG with the Pen tool while making the selection, like PNG I rotate the pen tool in the same way, rotate the pen tool once, by missing the pen tool, the line is coming up in the extras, you can do the cutting by cutting the way you make points with the pen tool. While making the second point in ion, you will round the selection, then you will see the extra me line above it, you have to click on the second point and cut it, by doing this, you have to make the selection pen tool made from it.
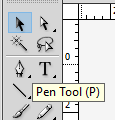
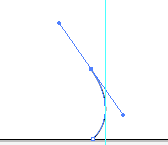
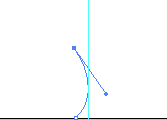
Step 5:- Now after making the selection, when you feel that the selection has not been made right, then you can use the Direct Selection Tool (A) to fix the selection.

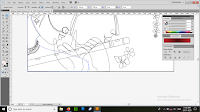
Step 6:- Now you have to take help of Ellipse tool (T) to create the rounded selection in PNG. To be afraid of duplicates, Copy (ctr + c) and then Pest (ctr + v).
Step 7:- Now you have to do color management after making the selection, for this you have to use the Gradient Tool (G). To give gradient color you have to click on the Gradient tool. You will see no selection bar, at that time you will see color and stroke color, this time you have to click on color and in that color group you will see gradient color (in which you will see 2-3 colors will appear together)
You have to click on that leg, then you have to click on the gradient tool (G) and in the selection in which you have to give color, you can change the color according to your choice. If you want to give the color of PNG then you have to open Photoshop PNG You have to give color in all the selections by choosing the color from which you have to give the code there with C, M, Y, K, in it.
Banner Design - We will use an image of Radha Krishna in this banner design that we have taught in this tutorial.
Now that we have everything we need, so let’s start!
Step 1:- Create a new file with 1000px width and 800px height.
Step 2:- Open the PNG of the Fantasy tutorial mentioned above.
Step 3: - Now to make the banner, we adjust the PNG file on the new file that we had created.
Step 4:- Now we make a selection by clicking on the PNG file with the help of Pen Tool (P), while making the selection, we need to keep the selection as if the selection was made like a PNG and while clicking on the PNG with the Pen tool while making the selection, like PNG I rotate the pen tool in the same way, rotate the pen tool once, by missing the pen tool, the line is coming up in the extras, you can do the cutting by cutting the way you make points with the pen tool. While making the second point in ion, you will round the selection, then you will see the extra me line above it, you have to click on the second point and cut it, by doing this, you have to make the selection pen tool made from it.


Step 5:- Now after making the selection, when you feel that the selection has not been made right, then you can use the Direct Selection Tool (A) to fix the selection.


Step 6:- Now you have to take help of Ellipse tool (T) to create the rounded selection in PNG. To be afraid of duplicates, Copy (ctr + c) and then Pest (ctr + v).
Step 7:- Now you have to do color management after making the selection, for this you have to use the Gradient Tool (G). To give gradient color you have to click on the Gradient tool. You will see no selection bar, at that time you will see color and stroke color, this time you have to click on color and in that color group you will see gradient color (in which you will see 2-3 colors will appear together)
You have to click on that leg, then you have to click on the gradient tool (G) and in the selection in which you have to give color, you can change the color according to your choice. If you want to give the color of PNG then you have to open Photoshop PNG You have to give color in all the selections by choosing the color from which you have to give the code there with C, M, Y, K, in it.
Step 8:- Now you have to create the background below, for that you have to use the Rectangle tool (M) and create an area and give color using the Gradient tool (G).
Step 9:- Now you can lower the layers by right clicking on the selection and clicking on Arrange to lower the layers.
In this way you can make a beautiful banner.




Post a Comment